Containerizing an Angular web application with Docker
Description of the project
Deploy an Angular web application in Docker. The Angular web application should be built with the Angular CLI tool and with Docker Compose.
Steps
Install dependencies
The first step is to install Docker, Docker Compose, Node.js, TypeScript and Angular in our system. To do so, run the following script (tested on a system running Ubuntu 20.04.3):
curl -fsSL https://get.docker.com -o get-docker.sh
sudo sh get-docker.sh
sudo curl -L "https://github.com/docker/compose/releases/download/1.29.2/docker-compose-$(uname -s)-$(uname -m)" -o /usr/local/bin/docker-compose
sudo chmod +x /usr/local/bin/docker-compose
sudo ln -s /usr/local/bin/docker-compose /usr/bin/docker-compose
curl -fsSL https://deb.nodesource.com/setup_16.x | sudo -E bash -
sudo apt-get install -y nodejs
npm install typescript -g
npm install -g @angular/cli
Create the Angular web application
To do so, we’ll use the CLI tool to create a new project and open the browser to the what we’re working with:
ng new angular-application
ng serve --open
Create the Dockerfile
Now we need to create the Dockerfile. This file will tell Docker to copy the project to the Docker container, build it for production, and install Nginx so we can access the container through port 80.
Create the file Dockerfile:
###############################################################################
# Stage 1: Compile and Build angular codebase
###############################################################################
# Use official node image as the base image
FROM node:latest as node

# Set the working directory INSIDE OF THE DOCKER CONTAINER
WORKDIR /angular-application

# Add the source code to app
COPY ./angular-application /angular-application

# Install all the dependencies
RUN npm install

# Generate the build of the application
RUN npm run build --prod


###############################################################################
# Stage 2: Serve app with nginx server
###############################################################################
# Use official nginx image as the base image
FROM nginx:latest

# Copy the build output to replace the default nginx contents.
COPY --from=node /angular-application/dist/angular-application /usr/share/nginx/html

# Expose port 80
EXPOSE 80
Create the Docker image
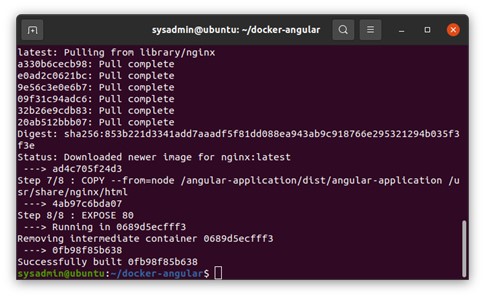
Now we need to create the Docker image, to see if everything works. To do so, run docker image build ..
You should see something like the following:

Create the Docker Compose file
The next step is to create the Docker Compose file, that will allow us to manage the application and make it scalable and portable.
Create the file docker-compose.yml:
# This file will use the Dockerfile to run a container with that image

version: "3.9"
services:
  web:
    # build: . will make Docker Compose run 'docker image build .'
    # https://stackoverflow.com/questions/29480099/whats-the-difference-between-docker-compose-vs-dockerfile
    build: .
    ports:
      - "80:80"
  # If we wanted more services, we'll put them right here
  #redis:
    #image: "redis:alpine"
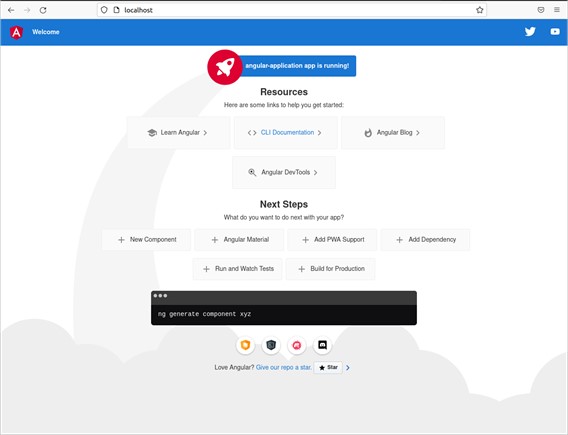
Now we can run docker-compose up and if we go to http://localhost:80 we’ll be able to see something like this:

To run the service as a daemon, you can run docker-compose up -d where -d stands for detached.
To stop the execution, you can run docker-compose stop or press Ctrl+C if you didn’t start the service as a daemon.
Conclusion
With Docker you can create safer and faster applications, and with Docker Compose you can define and run multi-container applications, making them scalable and portable.
You can check out the source code in my GitHub.