Rubber Ducky with Digispark ATtiny85
Do you want to have a Rubber Ducky but you don’t want to spend 50$ on it?
How about spending 2$ on a Digispark and program it yourself? If that sounds good, get your hands on one of those and follow these steps.
Notice: This tutorial is intended to be followed from a Windows 10 system.
Get started
The first thing is installing the drivers. To do so, go to this link and download the installer. Both 32 and 64 bit architectures are supported.
Now you can stick the Digispark ATtiny85 in a USB port and you should hear the Windows notification tone. Now if you go to the Device Manager, a new category named “libusb-win32 Usb Devices” should appear. That’s good, now the system recognizes the Digispark.
Configure the Arduino IDE
Go to this site and install the IDE, if you didn’t have it already installed on your system.
Now we have to configure the IDE so it works with out Digispark:
-
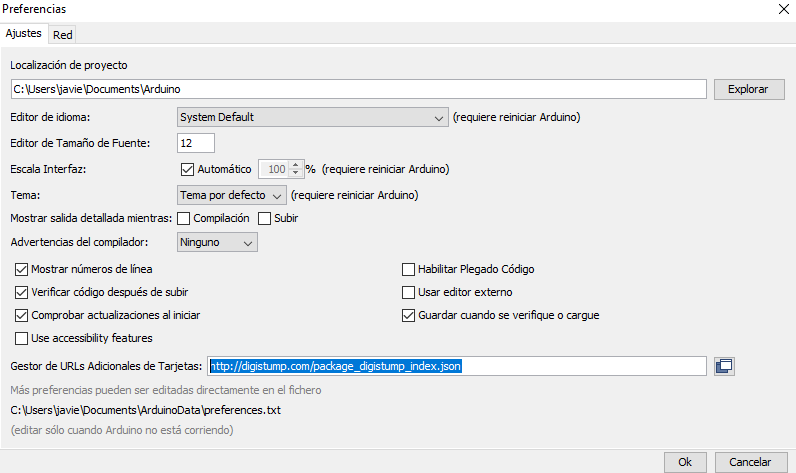
Open the IDE and go to File -> Preferences.
In the field named “Additional Boards Manager URLs” enter the following line:
http://digistump.com/package_digistump_index.jsonAs shown in the following image:
-
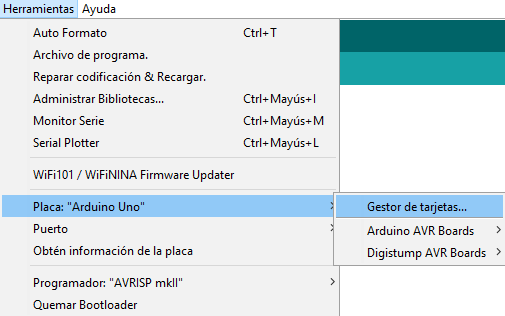
Go to Tools -> Boards -> Boards manager:
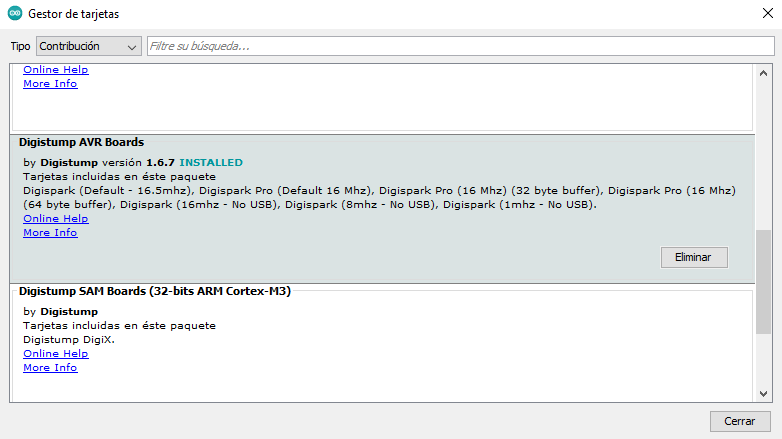
Select “Contributed” from the drop-down menu and then install the “Digistump AVR Boards” package:
-
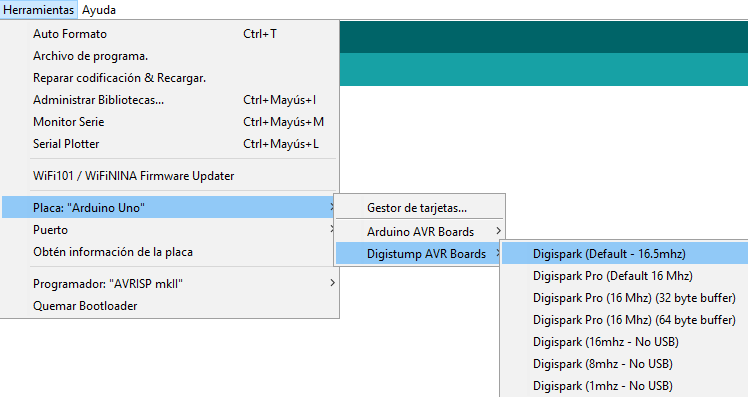
Now go to Tools -> Boards -> Digistump AVR Boards -> Digispark (Default - 16.5 mhz):
Test if it works
Create a new sketch and paste the following code:
// Creates a digisparked text file in the Desktop

#include "DigiKeyboard.h"

void setup(){
}

void loop(){
  // Start
  DigiKeyboard.sendKeyStroke(0);
  DigiKeyboard.delay(300);
  // Open "Run"
  DigiKeyboard.sendKeyStroke(KEY_R, MOD_GUI_LEFT);
  DigiKeyboard.delay(300);
  // Open "cmd"
  DigiKeyboard.print("cmd /k cd %UserProfile%/Desktop");
  DigiKeyboard.sendKeyStroke(KEY_ENTER);
  DigiKeyboard.delay(300);
  // Create the file
  DigiKeyboard.print("echo You have been digisparked :v > digisparked.txt");
  DigiKeyboard.sendKeyStroke(KEY_ENTER);
  DigiKeyboard.delay(300);
  // Close "cmd"
  DigiKeyboard.print("exit");
  DigiKeyboard.sendKeyStroke(KEY_ENTER);
  DigiKeyboard.delay(300);
  // Wait
  for (;;) {
    // To wait until the Digispark gets pulled out of the computer
  }
}
What this is going to do is simulate that you press WinKey+R, open “cmd” and create a file on the desktop named digisparked.txt.
Go to “Tools” -> “Port” and select the serial port that appears in the drop down menu. It usually is “COM0” or “COM1”.
Now click the “Upload” button and stick the Digispark in a USB port within the next 60 seconds. It will flash the code into the Digispark.
Now you can plug your Digispark, sit back, and get Digisparked!
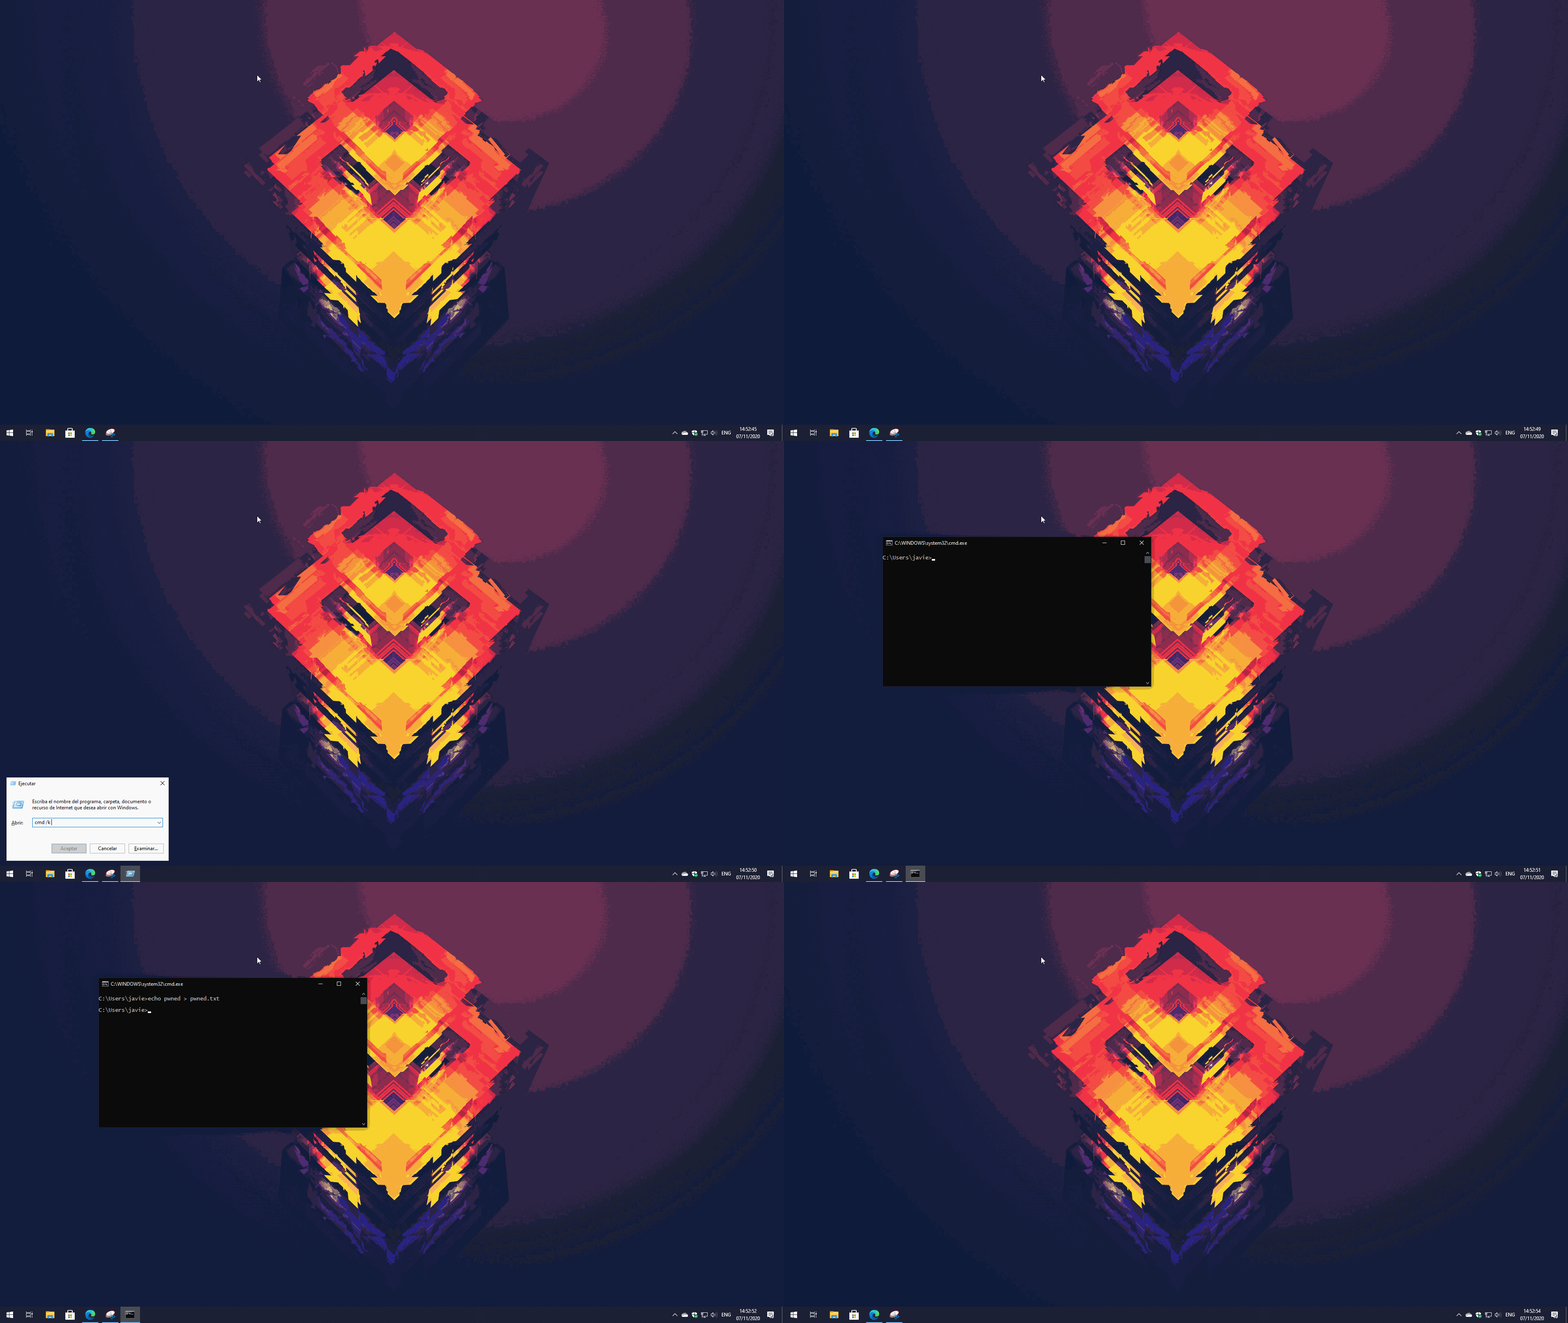
As you can see, it only takes about 2 seconds to get the job done.
Common errors
If you get this error when compiling the code:
"DigiKeyboard.h: No such file or directory"
Your board was likely changed in the settings when the Arduino IDE was reopened.
Go back to “Tools” -> “Board” and select “Digispark (Default - 16.5mhz)”
Extra
There is a GitHub project named “Duckyspark” that converts .duck scripts to the .ino format that our Digispark understands. It’s written in python3 and works well.
The syntax is as shown below:
python3 Duckyspark_translator.py <rubber ducky file> <digispark file>
With it, you can take any .duck script and use it on your Digispark!
More extra
There is a GitHub project named “Duck2spark” that works somewhat like the previous tool, but this one takes the output of Duckencoder (which supports different types of keyboard layouts) and converts it to an Arduino Sketch that you can upload to your Digispark.
Even more extra
If you want to go deep into this, here is a link to the “digikeyboard.h” file in the official GitHub project of digistump:
https://github.com/digistump/DigisparkArduinoIntegration/blob/master/libraries/DigisparkKeyboard/DigiKeyboard.h
And here is a link to the official “HID usage tables”:
https://www.usb.org/sites/default/files/hut1_21.pdf
And last, this webpage contains lots of .duck scripts that you can translate to Digispark using the Duckyspark tool:
https://ducktoolkit.com/userscripts